How to Format Fractions

Microsoft Word will automatically convert some fractions “1/4” to “¼” for you. This is true for the most common fractions, like:

Fraction Blog 01

Word does this by using its “Autocorrect” feature. When the font you’re using has the fractions already formatted, Word will substitute the fraction by using the built-in characters from your font.

But what if you want to type 3/16 and have it look like the other fractions? You can “fool” Word into doing this by using a combination of superscript for the number to the left of the diagonal line (/) and a smaller point size to the right of the line.

This is a simple two-step process, after typing your fraction. First highlight the numbers to the left of the diagonal line, and select superscript in the top ribbon or character dialog box:

Fraction Blog 02

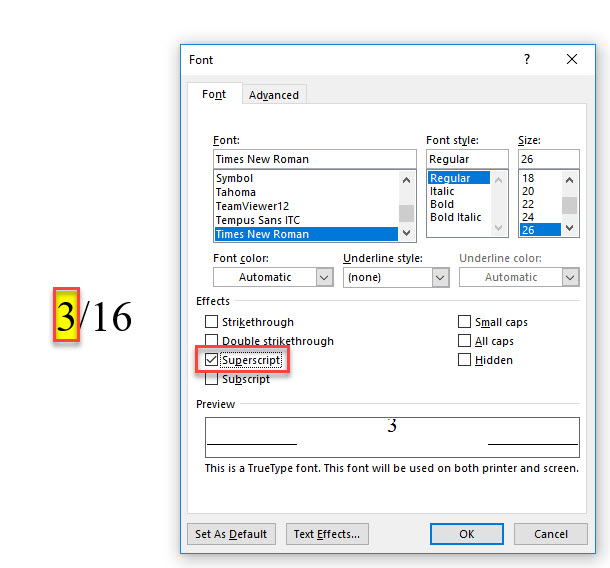
You should see something like this:

Fraction Blog 03

Next, highlight the numbers after the diagonal line. Then change the point size until it looks like the same size as the first number:

Fraction Blog 04

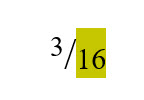
I find that the point size is roughly four “clicks” on the smaller point size symbol in the ribbon bar:

Fraction Blog 05

And voila! You have a newly formatted fraction!

Fraction Blog 06

Bobbins!!

On the saga of learning my new embroidery machine – I have noticed that this baby is a bit more particular about just how things are done. My latest discovery is how perfect the bobbin must be.

I was embroidering some cute free-standing lace for a donation project last night. It was going just great – beautiful stitching, smooth as silk when done. On the last half of the project, though, my bobbin ran out of thread. No problem, I’ve been doing this for years (says I), I can just pop a new one in, and proceed. 

A week or so ago, I purchased pre-wound bobbins from two places, both online. I put the new bobbin in from the first box I picked up…but it just wasn’t stitching right. I had to abandon the project, luckily only damaging one part of the stitchout. I thought I’d just do a couple of quick things and continue the lace the next day. But no matter what I did, it seemed, the bobbin just wasn’t catching the top thread properly. Well, phooey, I decided to wait until the next day to try again.

YouTube is a great resource for these things. After looking at a video of how to properly load the bobbin into the bobbin case, and then the bobbin into the machine, I double checked to make sure the bobbin area was free of debris…with canned air. I oiled it just in case (again), and still – the bobbin wouldn’t work.

Then I remembered reading somewhere on Facebook….maybe it was the bobbin itself! Sure enough, I took a bobbin out of the OTHER box, put it in, and Voila! The bobbin from the other box works great. The machine is humming along quite nicely.

Lesson learned…even though I’ve been sewing since I was maybe 12 years old (like over 50 years), I still have things to learn – even about the basics!

My New 15-Needle Embroidery Machine

Well, I did it — I bought a 15-needle Ricoma embroidery machine!

My Brother ULT2001 died a couple of months ago, and we decided that it just wasn’t worth fixing it. I was disappointed that the machine’s electronics gave out. But since I only paid about $800 for the machine several years ago, I shouldn’t complain.

I’d been considering a multi-needle for quite a while, but decided that I just couldn’t justify the price for the one I thought I wanted — the Brother 10-needle machine. But since my machine stopped working, I had to make a decision. Should I invest in a new Brother machine, costing perhaps $5,000 – $15,000? Or should I risk another used machine? It’s not just the cost of the machine; it’s also the cost of the extra hoops, and all that goes with a specific machine.

So I decided to “take the plunge” on a multi-needle. Both my husband and I looked and researched a variety of machines. He found that the Ricoma had a good reputation for quality among the Chinese machines. After considering a lot of machines, we did buy the Ricoma.

At first it was intimidating — it’s huge! And it weighs over 200 pounds, just for the machine! We had to do some planning to get the machine delivered, moved to my sewing room, and set up. But it all came together.

Here’s a picture of the machine:

2016-09-15-18-58-09
Ricoma 1501 TC

I’ve spent a few days getting to know the machine, and I’ve learned a few things:

  1. Don’t make the machine go too fast. You’ll get a lot of thread breaks.
  2. Make sure the bobbin is inserted correctly, and wound correctly in the bobbin case.
  3. Pay attention to the context! Since there’s not much of a manual, you have to be aware of what all those buttons mean.
  4. Threading the machine is not a piece of cake. 😉

I’ve had fun so far, just testing things. Maybe tomorrow I’ll actually make something!


Converting PDF Patterns to JPG Files

You don’t need to convert a PDF to a JPG file to just cut a pattern. However, if you want to draw pattern markings on your pattern files, you need to use another application to do that. I’ve been using Sure Cuts A Lot (SCAL) version 4 to set up my pattern files for cutting and drawing.

The first step is to convert the PDF pages you’ve purchased or received into JPGs. I have been successfully using Adobe Photoshop Elements, version 10, to open PDF files and convert pages from PDF to JPG.

For this example, I’m going to be using a free pattern for creating a Trendy Tee Shirt for a Kidz N Cats doll, found at Pixie Faire (used by permission). You can find the pattern here:

Free T-Shirt Pattern for Kidz N Cats Dolls

KNC_T-Shirt_Cover_WEB_large

I’ll be using the pattern to show how to get the PDF pages from your computer to the cutter, ready to draw pattern markings and cut out pattern outlines.