Just to recap – We are converting the PDF pattern pages for the free Trendy Tee Shirt for Kidz ‘N Cats doll from Pixie Faire. We’ve already saved the pattern pages from PDF format to JPEG, imported images of the pattern pages into Sure Cuts A Lot (SCAL), and traced the images of those pattern pieces, saving all in one file in SCAL.
The next step is to extract just the outline of each pattern piece for cutting. While it’s possible to manually trace around the pattern pieces, it’s easier to just let the software do it. However, SCAL “traces” every line of a pattern piece, not just the outer line of the pattern, giving us far more cut lines than we need or want. So, the next step will be to find each outline piece as quickly and easily as possible, and delete all the other lines we don’t want. This will be done by grouping all of the pieces together for each pattern piece, finding the outline piece, and deleting the rest. The “Group” function in SCAL makes this easy.
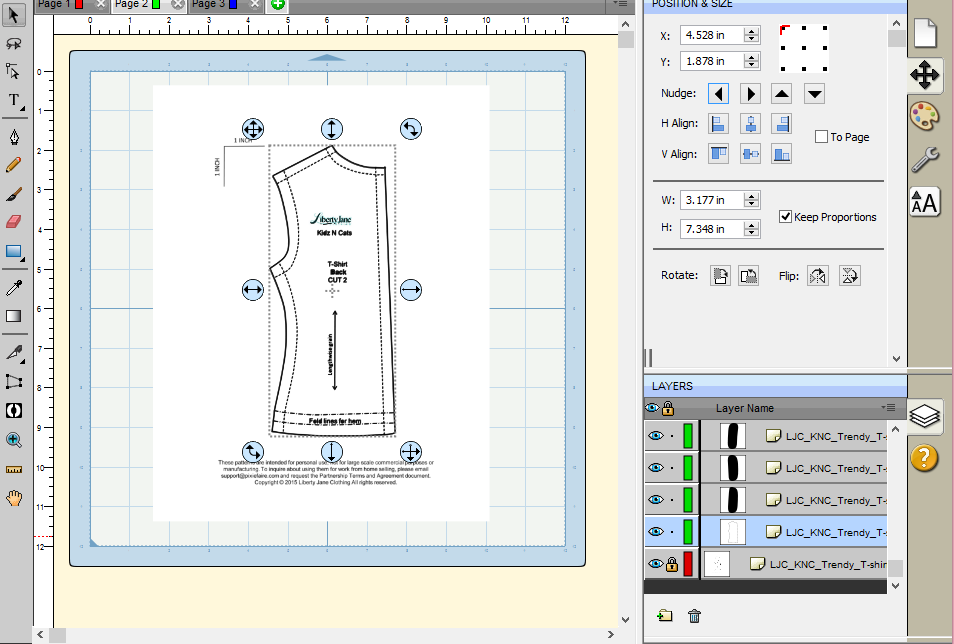
- If you don’t already have the file open that you created in the first three steps, open the file now. You should see something like this, with three tabs (one for each page of PDF pattern pieces), a Placed image of the page, and a Traced Image of the page.

- Starting on the second tab (page 2), select the top layer, or the traced image. The easiest way to do this is to click the top line under the “LAYERS” label:

- Next, go to the Object menu and select “Break Apart…”

- The pattern piece will usually look like it’s lost all the detail! Each time you do this, the colors might change, but you should see either something like this, or the pattern piece turned a solid color:

- In this particular case, SCAL didn’t change the appearance much, except for the area to the right of the fold line. Regardless of what the screen looks like, the next step is to Group all the pieces of the pattern piece. This page has only one pattern piece, so there will be just one group. There are often, however, more than one pattern piece per page. If that happens, create a group for each pattern piece. Simply drag the pointer around the entire pattern piece to select it, like this:

- Next select Group under the Object menu:

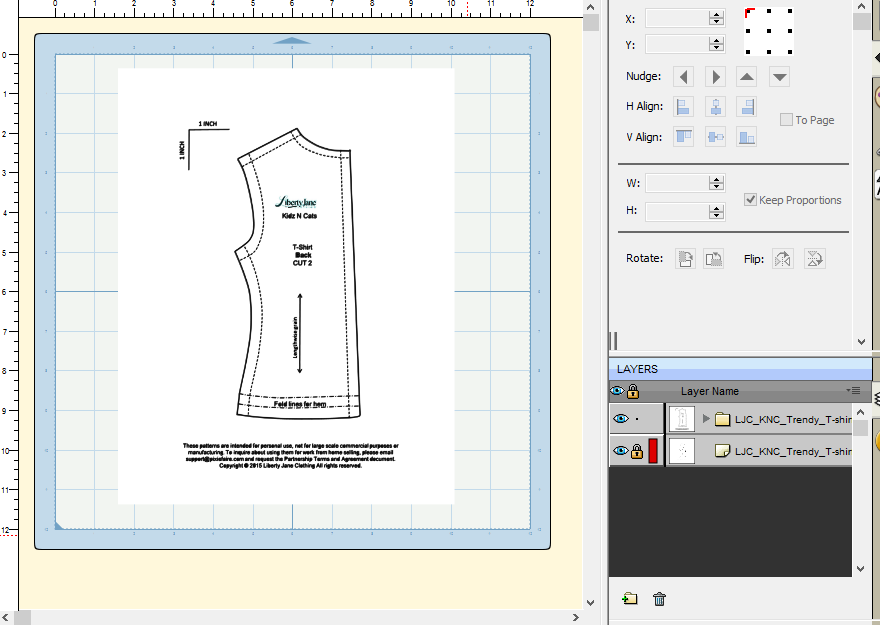
- Notice that at the right-hand side of the page under Layers, you now have the grouped pattern piece, a bit of leftover pieces, and the locked image file:

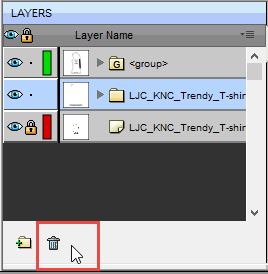
- Since we don’t need anything except what’s in the pattern piece, or the <group>, let’s delete the other parts of the page so they’re not in the way. To do that, select the “extra stuff” on the Layers menu, then hit the Trash Can icon:
- Now the page contains only the pattern piece group plus the background image. Open the little arrow to the left of the <group> name to view all the pieces to this pattern. These include the dotted lines, art work, text, and anything else that was captured when this was translated to an image. All we need is the cut piece, or the outline of the pattern piece. Scroll all the way to the bottom of the list of the group’s contents, and verify that the last piece in this long list, is the outline of the pattern:

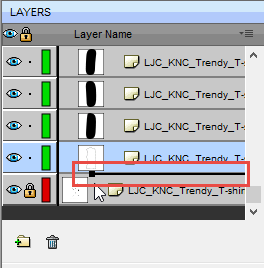
- What you see in the Layers menu, the last item after scrolling through the entire group, is the faint outline of the entire pattern piece. By looking at the screen, however, you can see that the outline is selected. That is the only piece of the pattern that we want for now. To isolate it from the rest of the group, drag it down from its location, and then to the left, and at the bottom of the list, where it will be separated from the group:


- The group can now be deleted from the page. Scroll to the top of the layers menu, collapse the group, be sure the title line is selected, and hit the Delete trash can icon at the bottom of the layers menu:

- You now have a perfect outline for cutting on your cutter!


There are a few issues with this pattern piece that need to be corrected before adding the draw lines. We’ll cover that in the next step. The first issue is that the pattern piece is not straight on the page. While this isn’t a problem when printing to a standard printer, it will be a problem with the cutter. Everything needs to be cut on the straight grain. Also, while it’s not easy to see in this view, the cut lines actually have a few extra cuts in them that need to be deleted. We’ll do that in Step 5.
