After converting the PDF to a JPG, bringing the file into Sure Cuts A Lot (SCAL) as both a background and outline, adding the pattern markings and addressing any issues with the pattern piece, we are finally ready to set up the pattern piece for cutting. To do that, we need to tell SCAL which lines are cut lines, which are draw lines, lay out the pattern pieces on a page for cutting, and export to a file appropriate for your cutter.
- The first thing we need to do is to indicate which lines are to be cut lines, and which are to be draw lines. Select the pattern piece in SCAL. Then select the Style menu by clicking on the little wrench icon on the right side of the screen:

- Since most of the lines in the pattern piece are Draw lines, let’s change all of them to Draw at this time:

- We still want the outline to be a cut line. Expand the group for the pattern piece, and scroll to the bottom of the group. The last piece should be the pattern outline. Select that piece only, and change it from Draw back to Cut:

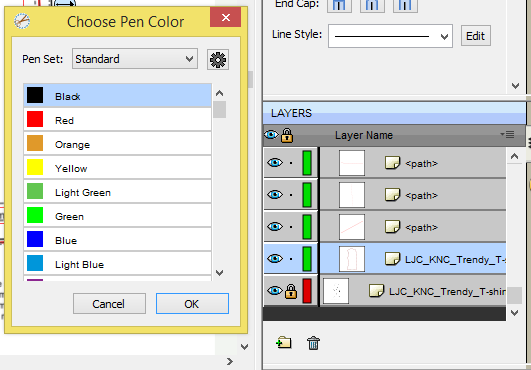
- The second thing to do is select colors. Some cutters assume that Black lines are Cut lines, and other colors are for drawing. It’s best to customize, then, on this color scheme for lines. For the sake of readability, I make draw lines red, and cut lines black. This is all done on the Fill and Stroke menu. Collapse the group and select the entire group. You should see:

- Since most of the pieces of the pattern are draw lines, let’s make all the pattern lines red. We’ll change the cut line to black afterwards. With the entire group selected, click the color square to the right of Stroke: Pen Color. When the pop-up window appears, select Red:

- Now select just the outline as you did when selecting the cut versus draw lines. Change the color of the outline to Black:

- The last thing to do is to look at the background pattern piece. How many pieces of the pattern will be cut? Most of the time, one pattern piece is pinned to a folded piece of fabric, and two pieces are cut. Since you are cutting one pattern piece on a flat piece of fabric, you must now make a copy of the pattern piece and flip it over. Double-check the pattern piece background to see how many pattern pieces you need. In this case, we need two: one as is, and one flipped over for the reverse side. Once you’ve verified the number of pattern pieces, you can delete the background pattern image. To do this, unlock the layer, select it, and hit the delete button at the bottom of the Layer menu:

- Once the background image is gone, you can now copy the pattern piece, and flip the copy. To copy the pattern piece, select it from the Layers menu, go to the Edit menu, and select Copy (or, select the piece and type <ctrl-C>):

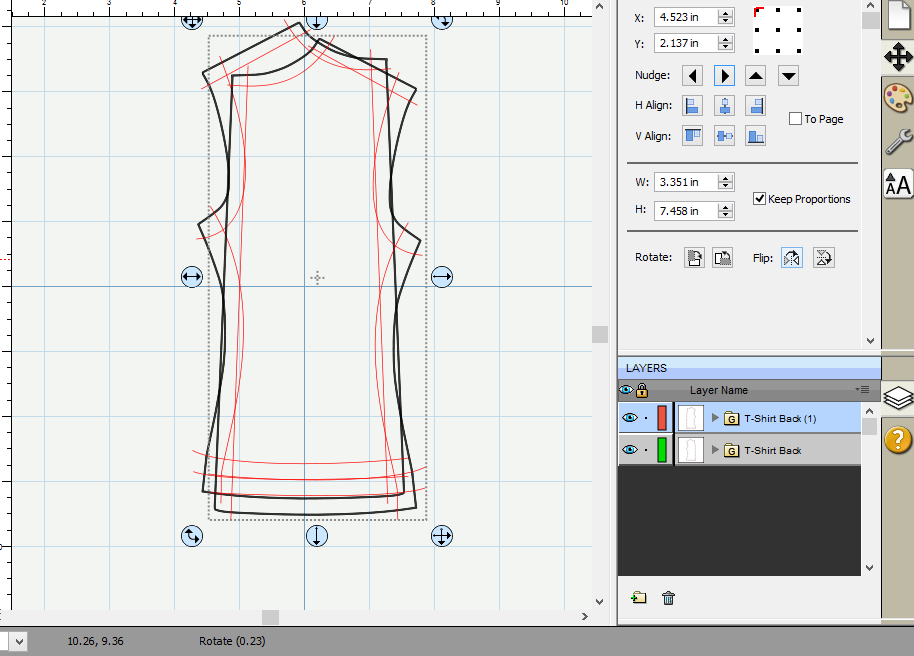
- Paste the copy onto the screen. You’ll want to flip the copy over so that it will be cut out correctly. Select the copied piece, then go to the Position & Size menu, and click on the icon to flip the pattern piece:

- You should see the following:

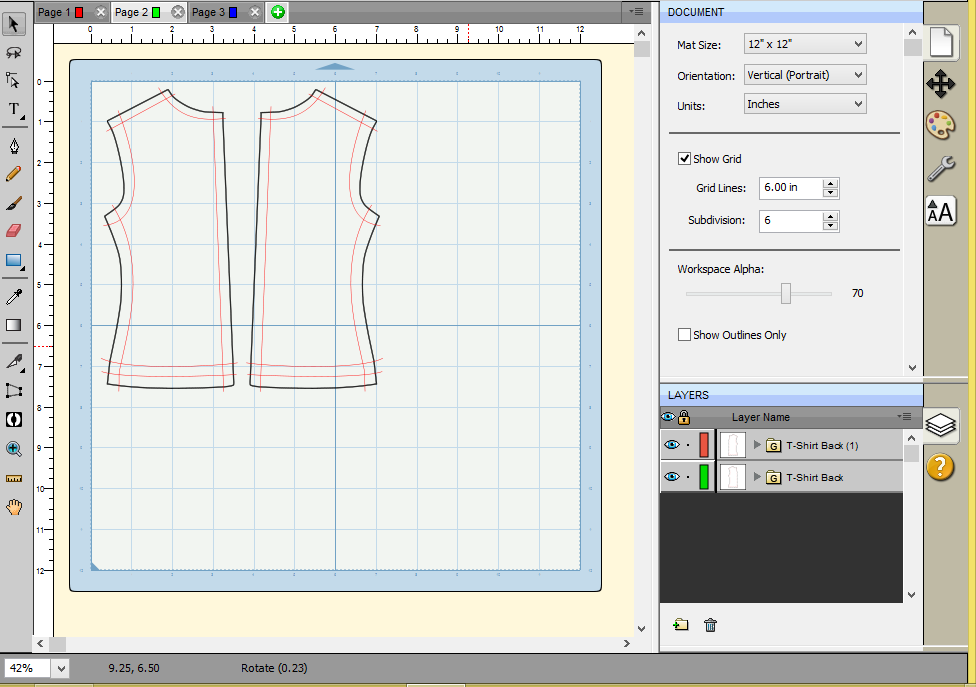
- Now, just move the pattern pieces around so that they are aligned next to each other, ready for cutting:

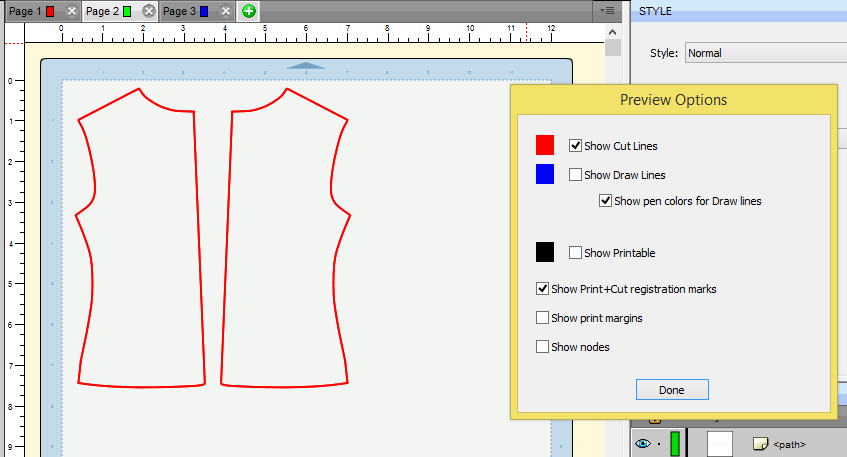
- Just to verify that the pieces are ready for cutting, hit the Preview button to be sure that the cut lines and draw lines are correct. Preview will show you just the cut lines: