Don’t you just love it when things are done for you, automatically? I do! Our house is slowly becoming automated. My office flood lights, for example, automatically come on at sunset. But if I want to use them earlier than that for some reason, all I have to do is go to my phone or tablet application, find the office floodlights section, and turn them on! It’s that simple! Recently, we even upgraded our system so that all we have to say is, “Alexa, turn on the office flood lights!” and they’re on! Amazing!
Wouldn’t it be great if we could automatically format our Word documents the same way—by clicking a button? Well, we can! Just use Styles!
If you’re using a current version of Word, just click on the Home menu item and the “Styles” will show up at the top of the screen. Word defaults to using the “Normal” style, but you can also use Headings, Titles, Quotes, and more! It’s also possible to set up your own styles.
Basically, a Style in Word can store anything in the following standard Word commands:

All you have to do is determine the settings for font, paragraph, tabs, borders, language (e.g., dictionaries), any frames, numbering, shortcut keys, or text effects. Once decided, you can set up a new style with all the settings you want, or modify an existing style to change to the settings you’d like. You can change the styles for just the document you’re working in, or for any document you use on your computer!
Watch a Style in Action
Just to demonstrate how Styles work, let’s watch a short video on what happens when you apply a style. The heading above this paragraph, right now, is using the “Normal” style. You can tell by looking at the Style menu bar in the Home menu. Move your cursor to the heading, and click down anywhere in the heading. Then look at the menu bar. You’ll see “Normal”! Click here.
Now let’s change that line to a heading. Normally, you’d have to highlight the whole thing, then select the font and paragraph settings. But if you use a pre-set Style, all the settings stored for that Style will be applied to the entire paragraph, as long as you have clicked your mouse (cursor) anywhere inside that paragraph. Let’s watch.
Amazing! The entire paragraph’s font, color, and paragraph settings have all been changed, just by the click of a button! Now, that’s useful automation!
Useful Styles
The most commonly used Styles that I use are:
- Normal
- Heading 1
- Heading 2
- Title
One of the main reasons these styles are so useful is that they can be used to automatically create a table of contents for your document! I’ll cover that on another page.
Create A Style
I also find that lists are particularly useful, whether they start with a bullet (·), or with a number. But since those don’t really exist in the standard set of styles, I need to create them myself. I’m particular about how I set up my numbered lists, so let’s proceed with modifying the “Normal” style to create two Styles: BL Bullet Lists and NL Numbered Lists.
Bullet Lists
The easiest way to create a Style from an existing one is to simply copy formatting that you’ve set up to a new Style. I’ll demonstrate with bullets.
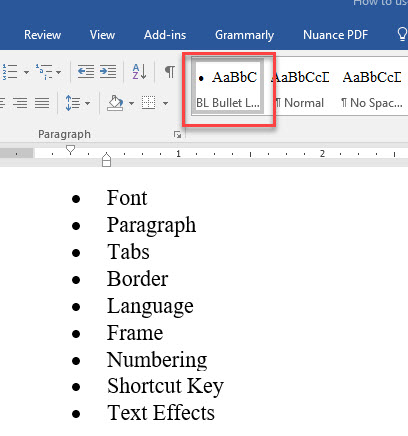
Let’s say I want to make a “Bullet List” of the types of formatting that a Style can store. Here’s the list:
Font
Paragraph
Tabs
Border
Language
Frame
Numbering
Shortcut Key
Text Effects
All I have to do to make that into a bulleted list is to apply the Bullet formatting to it:
- Font
- Paragraph
- Tabs
- Border
- Language
- Frame
- Numbering
- Shortcut Key
- Text Effects
Let’s watch how I did that.
But if I click on any of the lines with a bullet, the Style still says “Normal.” I would rather define those paragraphs with a style I’ll call BL Bullet List. To do that, all I have to do is click inside any of those paragraphs and define a new style from the Style menu. Here, I’ll just show a screenshot of where to look. First, move your cursor to the bottom right corner of the Styles scrolling window:

Click on that little arrow, and you’ll see an option to Create a Style…

You’ll see a little submenu that shows you what the style will look like, as well as a place to give it a name:
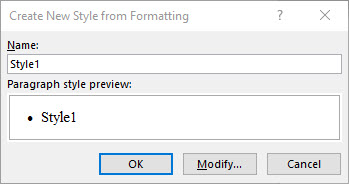
Here’s I want to add “BL Bullet List” to the box titled “Name:”

Click <OK>, and the Style will be created!
There’s one more step. I must now apply that style to all the paragraphs that have a bullet in front of them. Watch here.
Now, when I click on one of those bulleted paragraphs, I can see that the Style is “BL Bullet List.”
Now, why does any of that matter? Once you have created a style, you can modify it later. Wherever you’ve used a style in your document, you can change all of them at the same time just by changing the style, rather than one bullet list at a time. Let’s look at creating a Numbered List so that you can see where it can be really useful.
Creating a Numbered List
I’m going to just create a simple numbered list from 1 to 15 below for the sake of illustration. In Word, when you start a new paragraph with a number, a period, and a <space> or <tab>, Word will automatically assume that you want to make a numbered list.
- This is the first line.
- This is the second line.
- This is the third line.
- This is the fourth line.
- This is the fifth line.
- This is the sixth line.
- This is the seventh line.
- This is the eighth line.
- This is the ninth line.
- This is the tenth line.
- This is the eleventh line.
- This is the twelfth line.
- This is the thirteenth line.
- This is the fourteenth line.
- This is the fifteenth line.
I want to use a style on the numbered list, so I’m going to create one called “NL Numbered List” exactly the same way I created the BL Bullet List.
Step 1. Highlight text and create a style.

Step 2. Name the style.
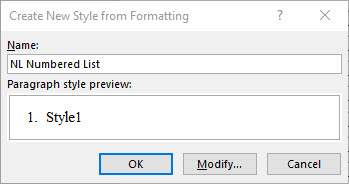
Step 3. Apply the style.

If I were using a larger point size, there might not be enough space after the number and period to begin the first line of the paragraph, and I might have a situation like this:

Here, I want to adjust the space around the number and period so that it aligns properly. It’s relatively easy to do that in paragraph 10, but if I’ve already typed paragraphs 1–9 throughout my document, and it’s not in a neat paragraph like these are, I have to go change the format on all of the paragraphs numbered 1 through 9. If I’ve used a style, though, I can change the style instead of the individual paragraphs, and all of them will align throughout my document. Watch this, as I change the style beginning at paragraph #12. In order to get to the “Modify” command, I’m <right-mouse-clicking> the NL Numbered List style on the menu.
In the Style for NL Numbered List, I simply clicked in one of the paragraphs, selected “Modify” from the NL Numbered List style with a right-mouse-click, and then moved to the bottom of the dialog box. I changed the paragraph settings so that there was no left indent, and increased the hanging indent to .4. All the numbers in the paragraphs then were aligned at the left margin, and the text of the paragraphs was also aligned at the left:

This is exactly the same procedure I followed when modifying Hanging Indents on this website, but this time I did everything using the Style menu instead.
