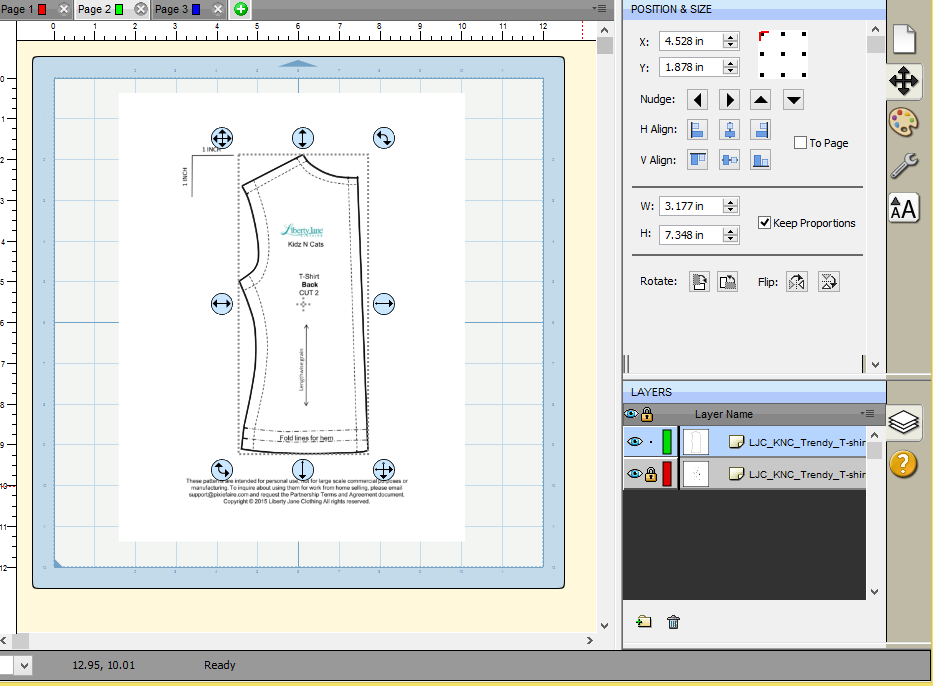
In the previous steps, we extracted just the outline from the traced image in Sure Cuts A Lot (SCAL). This particular outline has some problems: it’s not perfectly straight on the page, and there are some additional points inside the outline that will also be cut on the cutter, if they are not deleted.
Because we want to see the pattern image to draw the lines that will be drawn on the cutter, we’re not going to straighten the pattern now. We’ll wait to do that until after the draw lines are complete. For now, though, those extraneous dots inside the outline will be a problem. They’ll get in the way when trying to draw the pattern markings, and they would also be cut on the cutter.
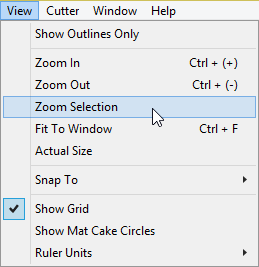
- Zoom in on the View menu. I find the easiest way to do this, at least initially, is to select the outline and then “Zoom Selection”:

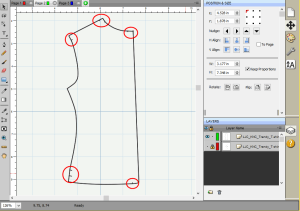
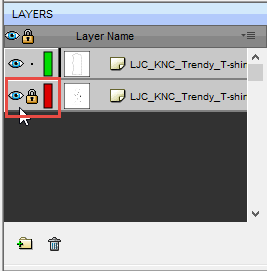
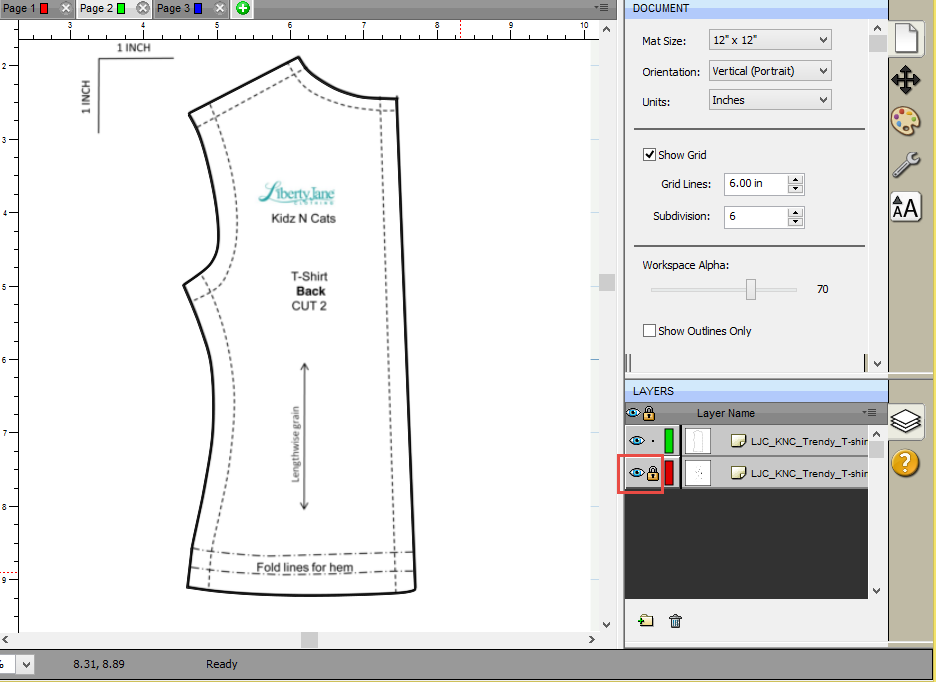
- For the moment, the background image is in the way, blocking us from seeing where the problems are. To temporarily hide the background image, click on the “eye” tool next to the background layer in the Layers area. You’ll see the problem areas in the outline with the background out of the way:

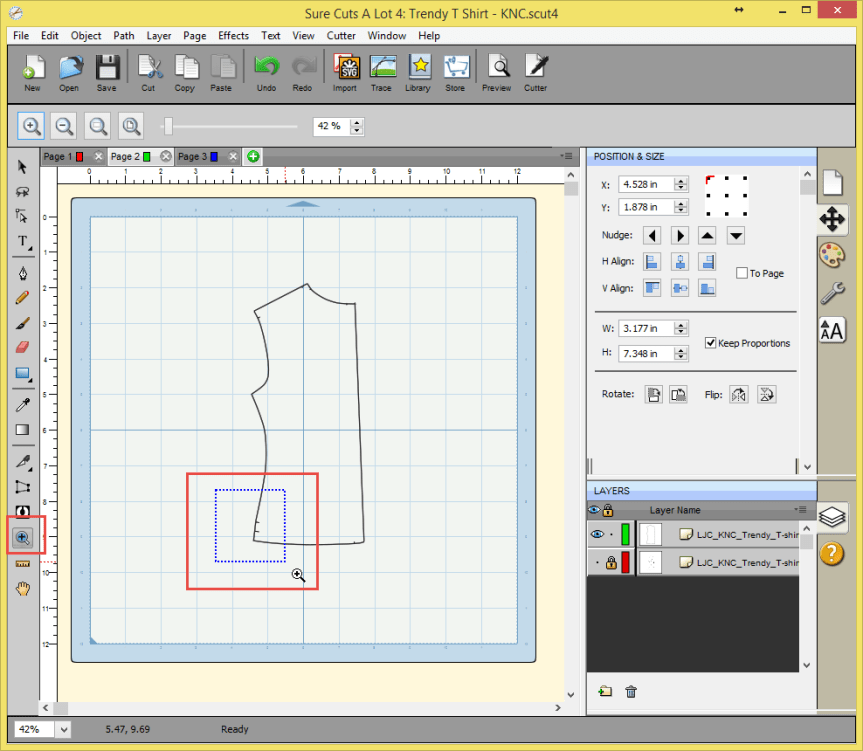
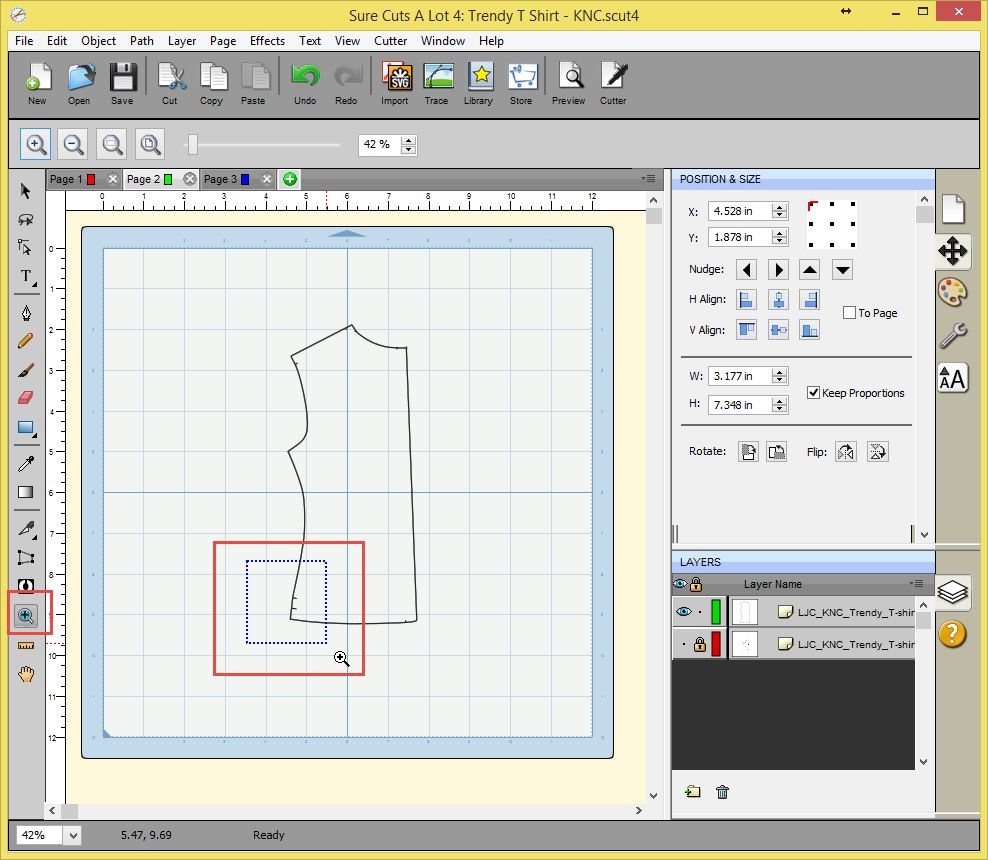
- Zoom into the first area to correct. Let’s correct the bottom left corner. To do that, select the Zoom tool at the far left edge of the screen, and then, with the Zoom tool selected, draw a box around the area you want to view:
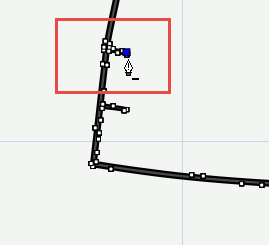
- Now select the Draw tool. This tool not only lets you draw lines, but it will also allow you to delete individual points along an existing line.

- As you move your cursor over the outline area, note that the outline turns into a series of dots. Move the cursor over an area where you want to delete lines. The dots on the screen will turn into blue squares, and the cursor will have a little “minus sign” right underneath it, to indicate that you can delete a point:

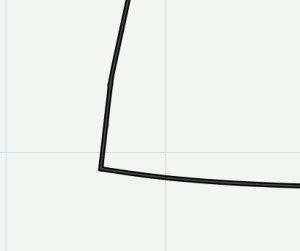
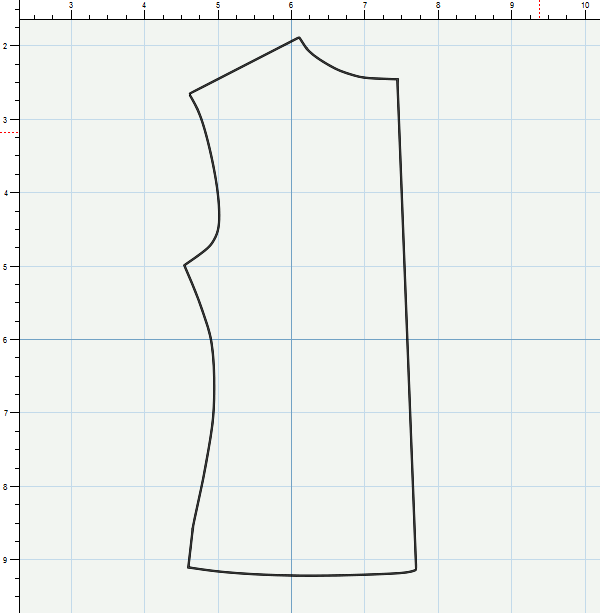
- Click on the blue dot, and it will be deleted. Continue clicking on the lines that are inside the outline area, so that they will not be cut on the cutter. This corner should look like this when finished:
- Continue to clean up the lines inside the outline until the completed outline looks like this:

- Display the background image again to get ready for the next step.


We’re now ready for the next step – adding the draw lines. Note that we haven’t straightened the image yet…we’ll do that after the draw lines are completed.
